Sunday, 12 August 2012

Internet Sharing WiFi with WEP encryption from OSX to non-Apple devices

I almost entitled this post as "How To Use Your Mac As A WiFi Hot-Spot", but hopefully the title I used will help more people find the article and get the simple answer on how to connect to Airport via Internet Sharing when using WEP as security.

There are a lot of simple articles about how to use your Mac as a WiFi Hot-Spot by sharing your Ethernet connection. If you don't know how to do that yet, then I recommend reading "How to Use Your Mac as a Wireless Router" which covers the general setup process nicely, although it does not address the problems you can face when using WEP and trying to connect from non-Apple devices (e.g Android phone/tablet, Windows PC, PS3, Wii, etc.)

The Mac Mini that I was using to share WiFi was running OS X 10.6.8, so the setup screens are slightly different from those in the article above. Here's a screenshot if you want to compare:


Mac OS X 10.6.8 only supports WEP security on Internet Sharing so you either have to use WEP or no security. Nobody wants uninvited users on their network, so using WEP is recommended. Unfortunately using WEP is what usually causes non-Apple devices to fail to connect to the network.

There is a "trick" to get it to work that I will clearly outline for you here, so you don't have to cobble together the solution from a half-dozen sources that all point in the direction but never actually have all the required steps (as I had to do).

This is the process that worked for me:

  • Set a Network Name that does not include spaces or special characters, you may need to reduce the name length (my actual Network Name is 9 characters long)
  • Leave the Channel as automatic unless you need to use something specific
  • Check the box for "Enable encryption (using WEP)"
  • Set the WEP Key Length to "40-bit (more compatible)"

Now comes the arcane step that will allow your non-Apple devices to connect
  • You must use a Password containing five HEXADECIMAL values prefixed with a dollar sign ($). The $ prefix tells your Mac you are entering a hexadecimal value. You do not need to use the $ prefix when connecting to the your Mac
  • Hexadecimal values contain of a pair of characters which are limited to 0-9 and A-F, so you need to enter a password which starts with $ and then has ten characters which must be numbers or the letters A, B, C, D, E or F. (examples $A1B2C3D4E5, $1234567890, $2FACEDBABE )
  • As soon as you enter the $ in the Password field, the WEP Key Length and the OK button will be disabled. When you have entered the same value in Confirm Password (including the $ prefix) then the OK button will be enabled for you to click.
  • If you want to use 128-bit encryption, you must enter 13 hexadecimal values, which equates to 26 characters plus the $ prefix. As soon as you type a password longer than described for 40-bit, then the disabled WEP Key Length field will change to 128-bit. (Note: I have not tested that 128-bit actually works)
  • Click OK and then check the Internet Sharing box, and then click Start.

You should now be able to connect your non-Apple device (and your Apple devices) to your HotSpot using the new password. Remember, you do not need to use the $ prefix when connecting to your Mac.

If you are still unable to connect to your Mac, it may be because your device is failing to receive an IP Address. This is a common problem with Playstation3 consoles, and there is a fix for that which I will detail in my next post How To: Connect Your PS3 To Mac Internet Sharing WiFi.


Note: This is a follow-up post to Dealing With WiFi Dead Zones.


Friday, 10 August 2012

Dealing With WiFi Dead Zones

This month we moved to a new home. Some things about the new place are better, other things are worse, and some things are just different. One of the "different" things is the property layout, it's much longer and narrower. This does cause a problem because the router is located at one end of the property, conveniently near my desk, but too far away from the living room for any usable WiFi.

I didn't want to install long ethernet cables here, so my first response was to look into signal boosting. I even tried the Windsurfer foil parabola reflector which didn't really work for me. Another inexpensive option I considered was to relocate the router to a more central position by using a long modem cable.  This approach didn't really work due to our property layout and the position of power outlets.

In the end I stumbled across a completely different approach which was fairly inexpensive and has provided WiFi signal across the whole house, although with two hotspots.

"TP-LINK's TL-PA211 powerline adapter takes advantage of your home's existing electrical wires to transfer data while simultaneously transferring traditional power. That means, with no additional wiring required, users can simply plug the TL-PA211 into existing power sockets and instantly establish a networking infrastructure."


I'd never used powerline adaptors for extending my network before, but I took a punt on these which has worked out to be a good solution for my set up. I plugged one powerline adaptor in next to the router and connected the ethernet cable, and then plugged the other adaptor at the other end of the house and connected it to my Mac Mini which is currently connected to the TV.

I then enabled Internet Sharing on the Mac Mini running 10.6.8, so that it acts as a WiFi hotspot. This worked great for connecting with an iPad and iPod Touch, but needed some special tweaks to connect non-Apple devices including an Android phone, Dell laptop, Wii and Playstation3. I'll detail the tricks for connecting those devices in my next posts.

Monday, 25 June 2012

Playing/Converting AVHDC .MTS files on OSX

Lately I've been using AVHDC (Advanced Video Coding High Definition) .MTS video files on OSX a bit. This video format is not greatly supported on OSX at this point in time. This HD format was developed by SONY and Panasonic and is considered to by a high quality format. My video files are coming from a Panasonic Lumix DMC-TZ10.

Playback
OSX does not currently natively support playback of these files. I recommend installing VLC http://www.videolan.org/vlc/index.html which is both free and has a large enthusiastic usage community.

Conversion 
If you want to use these files in iMovie then you have to import them directly from the camera. This can be both slow and reduce the video quality. If you are not wanting to use iMovie and just want to convert to MPEG-2, DivX, H.264, etc. then you will probably have noticed most search results end up pointing to an expensive piece of conversion software with a heavily crippled trial version.

VLC (see above) does include conversion/export functionality, but its results are a bit unpredictable and is best suited to stream capture.

The best option I have discovered which is fast, reliable and free is Handbrake http://handbrake.fr/ This application is commonly used by some to rip DVD content to a playable file, but it has a great video transcoder at it's core and really does a great job converting .MTS files on OSX for free :)

Wednesday, 23 May 2012

Introducing TheToolbox.cc

I was recently introduced to TheToolbox.cc which is a handy site for web developers. TheToolbox is a collection of best-of-breed tools and helpers for a wide range of jobs: Animation, Bookmarklets, Colors, CSS, Editors, Grids, Icons, Images, Javascript, Lorem Ipsum, Markup, Patterns, Photoshop, Reference, Regular Expressions, Responsive Design, Sprites, Starter Kits, Time & Date, Typography, Unicode, and Web Performance. Definitely worth checking out and bookmarking if you have to deal with those sort of things on a semi-regular basis.


Thursday, 8 September 2011

Syntax Highlighter Chrome Extension: Sight

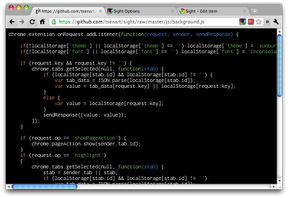
Last week a colleague introduced me to a handy Chrome Extension called Sight that allows syntax highlighting in your browser and "makes reading code on the browser a joy".

After using it for few days I have to admit that it does make javascript a lot easier on the eye. It has optional line numbers and supports syntax for about 35 different languages.


Sadly it doesn't support view-source highlighting, but apparently it's next on the to-do list and is still worth installing in it's current state.

If you're using Chrome you can get the extension from here https://chrome.google.com/webstore/detail/epmaefhielclhlnmjofcdapbeepkmggh

Friday, 3 June 2011

WordPress Form Helper Functions

Setting the state of checkboxes, radio buttons and selected items in dropdown lists in html forms can become tiresome, so I was pleased to recently discover WordPress has some built-in helper functions. I've found these to be pretty handy in building admin forms for Wordpress plugins and hopefully they can save you some time too.

checked( $checked, $current = true, $echo = true )

This function compares two given values (for example, a saved option vs. one chosen in a form) and, if the values are the same, adds the checked attribute to the current radio button or checkbox. This is essentially the same as comparing values with if(), but results in more concise code. The third parameter determines if the result is echoed or just returned which is handy if you are concatenating to a string, etc.

This function has been defined since WordPress v1.0 and is documented here.


selected( $selected, $current = true, $echo = true )

This function is for use in dropdown form fields. Compares two given values (for example, a saved option vs. one chosen in a form) and, if the values are the same, adds the selected attribute to the current option tag. Again, the third parameter determines if the result is echoed or just returned which is handy if you are concatenating to a string, etc.

This function has been defined since WordPress v1.0 and is documented here.


disabled( $disabled, $current = true, $echo = true )

This function compares two given values (for example, a saved option vs. one chosen in a form) and, if the values are the same, adds the disabled attribute to a form input field. Again, the third parameter determines if the result is echoed or just returned which is handy if you are concatenating to a string, etc.

This function was not defined until WordPress v3.0 and is documented here.

These functions are all located in wp-includes/general-template.php.

Tuesday, 26 April 2011

Using Recycle Files (REX) With Logic Express

This week I made the leap from using Cubase 5 on Win32 to Logic Express on OS X. I don't get as much recording done lately as I would like, so thought I would try Logic Express first before committing to the more expensive Logic Pro.

One of the problems I found was that Logic Express was not recognising my REX files and prompting me to install a REX Shared Library from Propellerheads.se. Searching the Propellerheads site didn't seem to turn up the results until I eventually I spotted this link hidden away in the last column of the footer of the Downloads page.

http://www.propellerheads.se/download/index.cfm?fuseaction=get_article&article=rexsharedlibrary

There are a few versions there so I downloaded this one as it matched my setup

REX Shared Library 1.7 - Universal Binary
For owners of Logic 9.1.2 and later
http://www.propellerheads.se/download/files/Install_Rex_1_7_library.pkg

The install all appeared to work properly but Logic Express was still reporting the same error.
I tried restarting Logic Express, but the error persisted.
I tried restarting my machine, but the error persisted.
I tried reinstalling and carefully read every screen - nothing was wrong there.

I started searching various forums and found there were confusing opinions about the probable cause, most of them quite out of date and that there were multiple possible install paths.

After much reading I found that the files had been installed to /Library/Application Support/Propellerhead Software/REX but the red icon on the folder in Finder told me that I did not have permission to access that folder. It seems that the installer has an issue setting permissions.

I opened a Terminal window, navigated to that folder and entered this command: sudo chmod REX 777 to set the permissions wide open.

After that Logic Express was able to process REX files properly.